When your computer decides to throw a digital tantrum – freezing, crashing, or just stubbornly refusing to turn on – it's often more than a software glitch. These moments are usually the tell-tale signs of hardware that’s faltering, leading you down the frustrating path of Resolving Hardware & Device Malfunction Errors. But before you panic and reach for your wallet, know this: many common hardware woes are both identifiable and fixable, even if you’re not a certified tech guru.
This guide isn't just about band-aid solutions; it's designed to transform you from a bewildered bystander into a confident troubleshooter. We'll demystify those cryptic error messages, explore the usual suspects behind hardware failures, and equip you with the practical steps to diagnose, fix, and even prevent future meltdowns.
At a Glance: Your Quick Troubleshooting Toolkit
- Don't Panic, Diagnose First: Before reaching for a new part, pinpoint the symptoms. Does it crash randomly, make strange noises, or simply not boot?
- Leverage Built-in Tools: Your operating system likely has diagnostic utilities (like Windows Memory Diagnostic) ready to scan for issues.
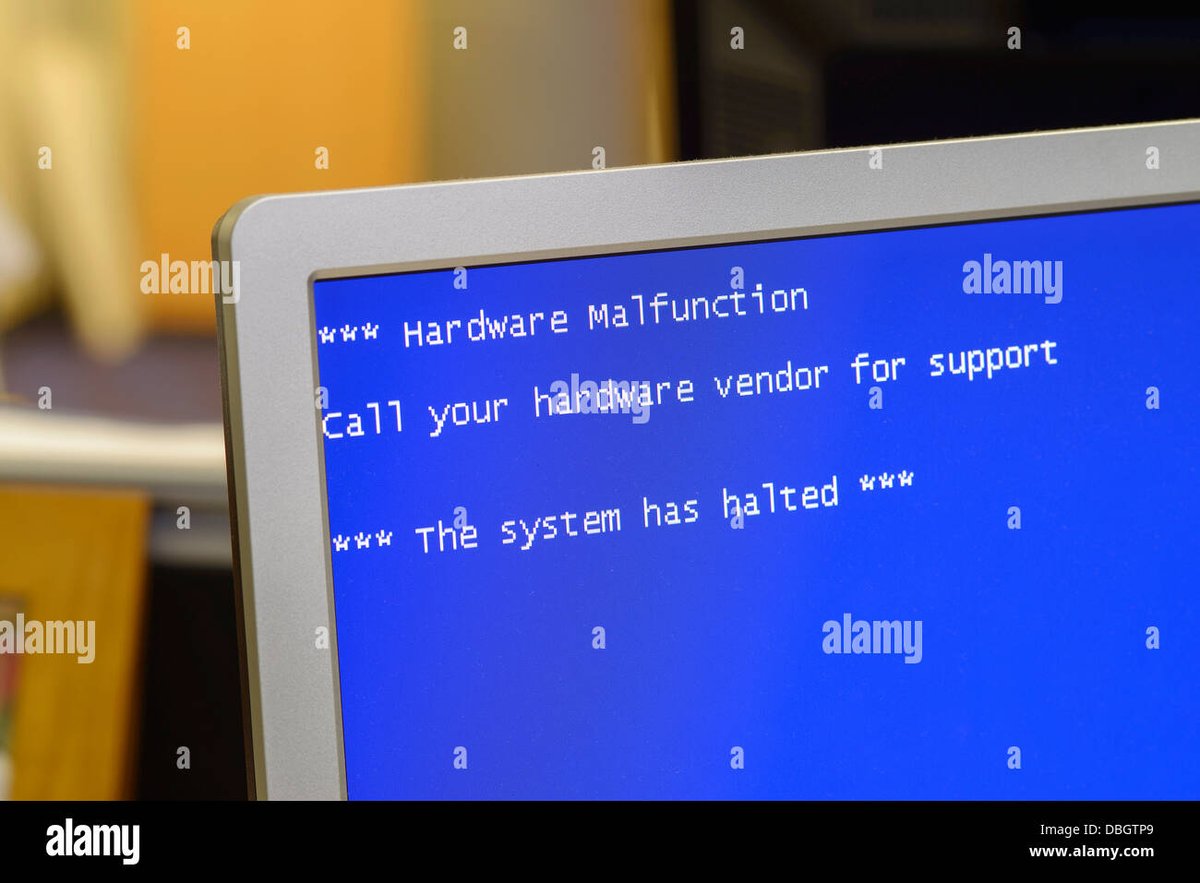
- Note Error Codes: Blue Screen of Death (BSOD) or other stop errors aren't just frustrating; they're clues. Write them down and research their meaning.
- Start Simple: Check power connections, cables, and basic settings before diving into complex internal diagnostics.
- The Usual Suspects: Power supply, hard drive, RAM, motherboard, and graphics card are common points of failure.
- Dust is the Enemy: Overheating due to dust buildup is a frequent cause of instability and premature component failure.
- When in Doubt, Back Up: If you suspect a storage device failure, prioritize data backup immediately.
- Know Your Limits: Replacing complex components like motherboards often warrants professional help.
The Unavoidable Truth: Why Hardware Flips Out
Hardware failures are, unfortunately, an inevitable part of owning any electronic device. Like any physical component, circuit boards, fans, and storage drives have a finite lifespan and are susceptible to wear, tear, and unexpected stress. Understanding that these issues are common—and often identifiable—is the first step toward effective troubleshooting.
Common symptoms that point to a physical problem rather than a software bug include:
- Random crashes or freezing: Your system locks up unexpectedly.
- System slowdowns: Even simple tasks take ages.
- Unusual noises: Clicking from your hard drive, grinding fans, or persistent beeps.
- Devices not recognized: Your USB drive or external keyboard suddenly stops working.
- "Blue Screen of Death" (BSOD) or other stop errors: The system suddenly shuts down with a cryptic error message.
- Failure to start or black screen: Your computer powers on but nothing appears on the display.
- Intermittent power loss: Your machine randomly shuts off or restarts.
These symptoms are essentially your computer's way of crying for help. Learning to interpret them is key to a swift resolution.
First Responder Protocol: Initial Diagnosis
Before you open your computer case or start swapping components, a systematic diagnostic approach can save you time, effort, and potentially money. Think of yourself as a detective, gathering clues to narrow down the suspect list.
Identifying the Problem Area
Start by observing when and how the problem occurs.
- Is the computer not turning on at all? This points to power supply, motherboard, or a fundamental startup issue.
- Does it make strange noises? Often indicates a failing hard drive or fan.
- Does the problem occur during specific tasks? For example, crashing during gaming suggests a graphics card or overheating issue, while application crashes might point to RAM.
Pinpointing the context helps you focus your investigation.
Leveraging Built-in Diagnostic Tools
Many operating systems include handy tools designed to check your hardware's health. Don't overlook these first lines of defense:
- Windows Memory Diagnostic (WMD): A powerful tool for checking your RAM. You can schedule it to run on your next restart via Control Panel > System and Security > Administrative tools > Windows Memory Diagnostic, or simply type
mdschedin the Start search. If your computer won't boot, WMD can sometimes be accessed through the Windows Boot Manager by pressing the space bar repeatedly during startup. WMD runs a standard test with two passes by default, but you can choose Basic, Standard, or Extended levels, and increase the number of passes for a more thorough (but longer) check. More passes are better for finding intermittent problems. - Apple Diagnostics (macOS): For Mac users, Apple Diagnostics (or Apple Hardware Test on older models) can check various components like the CPU, memory, and logic board. To run it, disconnect all external devices except the keyboard, mouse, display, and Ethernet connection. Restart your Mac and immediately press and hold the D key until you see a screen asking for your language.
- BIOS/UEFI Diagnostics: Many modern motherboards come with their own pre-boot diagnostic utilities accessible through the BIOS/UEFI setup. Consult your motherboard manual for instructions on accessing and running these.
Deciphering Error Codes
When your system crashes, especially with a "Blue Screen of Death," it often displays an error code (e.g., 0x000000ED or IRQL_NOT_LESS_OR_EQUAL). These codes are invaluable clues.
- Note Them Down: Always write down the exact error code and any accompanying text.
- Search Online: A quick search for the specific error code on a reliable search engine can often lead you directly to explanations and common solutions. This step is crucial for understanding the root cause. If you're encountering a particularly obscure or persistent error, it’s beneficial to understand what this error is in its broader context, as seemingly unique issues often stem from common underlying failures.
Common Culprits & Their Cures
Let's dive into the usual suspects responsible for hardware headaches, along with their distinct symptoms and practical solutions.
The Grinding Halt: Hard Drive Issues
Your hard drive is where all your precious data lives. When it starts to fail, the implications can be severe, from data loss to an unbootable system.
Symptoms:
- Freezing and stop errors: Especially when trying to access files or load programs.
- Bad sectors: Files become corrupted, disappear, or are inaccessible.
- Frequent crashes: Without a clear pattern or software cause.
- Strange clicking or grinding noises: A definite warning sign that the drive is physically failing.
Diagnosis and Solutions: - Use
chkdsk(Windows): This utility scans for and attempts to repair disk errors, including bad sectors. - GUI Method: Click Start > Computer > Right-click the volume (e.g., C:) > Properties > Tools tab > Error-Checking > Check Now. Make sure to select "Scan For and Attempt Recovery of Bad Sectors." If it's your system volume, you'll be prompted to schedule the check for the next restart.
- Command Line Method: For more control, open Command Prompt as an administrator (Start, type
cmd, right-click and "Run as Administrator"). Typechkdsk c: /f /v(replacec:with the appropriate drive letter) to check, repair, and display cleanup messages. If it's the system volume, typeYto schedule it for the next reboot. - Data Recovery: If you suspect a hard drive failure, immediately back up any critical data. Time is of the essence. Use data recovery software as a first step, but for severe physical damage, professional data recovery services might be your only option.
Prevention: - Defragment HDDs Regularly: For traditional hard disk drives (HDDs), defragmentation helps keep data organized, reducing wear and tear. (SSDs do not need defragmentation.)
- Upgrade to an SSD: Solid State Drives (SSDs) offer significantly better performance, durability, and shock resistance compared to HDDs, making them a wise upgrade for reliability.
The Forgetful Brain: Memory (RAM) Issues
RAM is your computer's short-term memory, essential for running applications smoothly. When it's faulty, your system can become incredibly unstable.
Symptoms:
- Stop errors and "Blue Screen of Death": Often with memory-related error codes like
MEMORY_MANAGEMENT. - System failing to start: With accompanying beep codes (check your motherboard manual for their meaning).
- Random restarts: Especially under load.
- Applications crashing or failing to load: With "memory could not be read" errors.
Diagnosis and Solutions: - Startup Repair (Windows): If your system fails to start due to suspected RAM issues, first try Windows' built-in Startup Repair, which can sometimes identify and fix booting problems.
- Windows Memory Diagnostic (WMD): As mentioned earlier, this is your primary tool for diagnosing RAM issues. Schedule it to run and let it complete its passes. If it reports errors, you likely have bad RAM.
- Physical Check:
- Reseating: Power down your computer, unplug it, and open the case. Carefully unclip and re-seat your RAM modules firmly back into their slots. Sometimes a loose connection is all it takes.
- Isolation: If you have multiple RAM sticks, remove all but one. Try booting. If it works, swap in another stick. This helps identify which specific module might be faulty.
- Replacement: If reseating doesn't work or WMD confirms errors, replace the suspected faulty RAM module with new, compatible memory. Ensure the new RAM matches your motherboard's specifications (DDR generation, speed, capacity).
The Silent Switch-Off: Power Supply (PSU) Failures
The Power Supply Unit (PSU) is the heart of your computer, delivering electricity to all components. A failing PSU can manifest in dramatic ways or subtly cripple your system.
Symptoms:
- Computer doesn't power on at all: The most definitive sign.
- Intermittent power loss or random shutdowns: Especially when under load.
- Freezing before the operating system even starts: Due to unstable power delivery.
- Unusual burning smell: A strong indicator of serious component failure within the PSU itself.
- Loud fan noises or no fan operation from the PSU: Could indicate a failing fan leading to overheating.
Diagnosis and Solutions: - Immediate Action: If you see smoke or smell burning, power down and unplug the computer immediately. If smoke persists or there's a visible flame, use a fire extinguisher approved for electrical devices. Safety first!
- Basic Checks:
- Plugged In? Ensure the computer is firmly plugged into a working wall outlet. Test the outlet with a known working device (like a lamp).
- Switches ON? Check the main power switch on the back of the PSU and any internal power switches on the motherboard are in the ON position.
- Internal Cables: Open the case and ensure all power cables are securely connected to the motherboard, graphics card, and other components.
- Cable and Voltage:
- Power Cable Swap: Try swapping the main power cable with a known working one.
- Voltage Switch: Many PSUs have a small red switch on the back to select input voltage (110V/120V or 220V/240V). Ensure this is set correctly for your region. Incorrect setting can prevent the computer from powering on or cause damage.
- Testing and Replacement:
- Paperclip Test (Advanced): For experienced users, a paperclip test can verify if the PSU fan spins and if it's receiving power (search for tutorials carefully, as incorrect procedures can damage the PSU).
- Multimeter Test (Advanced): A multimeter can be used to check individual voltage outputs from the PSU connectors. This requires caution and knowledge of electrical safety.
- Swap Test: The most reliable DIY test is to temporarily swap your PSU with a known working one (if available). If the computer powers on with the new PSU, your old one is likely faulty.
- Replacement: When replacing a PSU, ensure the new unit has sufficient wattage to power all your components, especially if you have a powerful graphics card or multiple drives.
The Core Collapse: Motherboard Problems
The motherboard is the central nervous system of your computer, connecting all components. Problems here can be particularly complex and manifest in a wide range of confusing symptoms.
Symptoms:
- Computer won’t boot at all: Even with a working PSU.
- Components not detected: RAM, GPU, or other installed parts simply aren't recognized.
- Frequent crashes and blue screens: Often without specific error codes or with codes that point to generic hardware failure.
- No beep codes or video output: The system powers on, but nothing happens, and no diagnostic beeps are emitted.
- Specific beep codes but no start: The system emits a series of beeps.
Diagnosis and Solutions: - Motherboard Diagnostic Software: Some higher-end motherboards come with proprietary diagnostic software. Check your manufacturer's website or manual.
- No Beep Codes or Video Output:
- Power & Monitor Check: Double-check that your computer is receiving power and your monitor is plugged in, switched on, and connected to the correct video port.
- Minimal Configuration: Remove all external accessories (USB drives, external sound cards, etc.). Try booting with just the essential components: CPU, one stick of RAM, and the graphics card (or integrated graphics).
- PSU Fan: Verify the PSU fan is running. If not, the PSU itself might be the problem, not the motherboard.
- Visual Inspection: Carefully inspect the motherboard for any signs of physical damage: swollen capacitors, blackened areas, or melted components. Any visible damage almost certainly means replacement.
- Connections: Confirm all necessary power connectors (24-pin ATX, 4/8-pin CPU power) are securely plugged into the motherboard.
- Reseat Components: Ensure the motherboard itself is seated correctly in the case, and that RAM and CPU are properly installed and locked into place. Check any jumpers against the manual.
- Reset BIOS: As a last resort, power down, unplug, and remove the small circular CMOS battery from the motherboard for about 30 minutes. This will reset the BIOS to its default factory settings, which can sometimes resolve boot issues caused by incorrect settings.
- Beep Codes but No Start: This is a more helpful symptom.
- Minimal Setup: Again, remove all non-essential external accessories.
- Consult Manual: Immediately refer to your motherboard's manual or the manufacturer's website. Beep codes are specific to each BIOS manufacturer (AMI, Award, Phoenix) and provide direct clues (e.g., "one long, two short" often means a graphics card issue).
- Professional Help: Replacing a motherboard is arguably the most complex DIY hardware task. It often requires reinstalling the operating system, and precision is critical. If your efforts don't yield results, or you're uncomfortable with the process, professional assistance is highly recommended.
The Flickering Display: Graphics Card (GPU) Issues
Your Graphics Processing Unit (GPU) is responsible for everything you see on your screen. A failing GPU can lead to frustrating visual anomalies and performance drops.
Symptoms:
- Screen flickering or blackouts: Intermittent loss of display signal.
- Poor performance during graphically intensive tasks: Games run slowly, video editing is choppy.
- Strange visual artifacts: Unusual lines, dots, or blocky distortions appearing on the screen, especially during 3D applications.
- No display output: Computer powers on, but nothing appears on the monitor.
Diagnosis and Solutions: - Reseating: Power down, unplug, open the case, and carefully remove and reinsert (reseat) your graphics card firmly into its PCIe slot. Ensure any auxiliary power cables (6-pin, 8-pin) are also securely connected.
- Integrated Graphics: If your CPU has integrated graphics (most modern Intel CPUs and some AMD APUs do), remove your dedicated GPU and plug your monitor directly into the motherboard's video output. If the display works fine, your dedicated GPU is likely the problem.
- Driver Issues: Sometimes, a problem isn't the hardware itself but corrupt or outdated display drivers. Use Device Manager (Windows) to uninstall current drivers, then download and install the latest drivers directly from the GPU manufacturer's website (NVIDIA, AMD).
- Temperature Check: Overheating can cause GPU issues. Use monitoring software (like HWMonitor or MSI Afterburner) to check your GPU temperatures, especially under load.
- Upgrade: If poor performance is the primary issue and your current GPU is old, upgrading to a more powerful graphics card might be the solution, assuming other components meet the minimum requirements.
The Fiery End: Overheating & Cooling System Failures
Heat is the silent killer of computer components. When cooling systems fail, components get too hot, leading to instability, performance throttling, and premature failure.
Symptoms:
- Losing power after a few minutes of running: The system overheats and shuts down to prevent damage.
- Computer shuts down unexpectedly: Similar to the above, often without warning.
- Fans running loudly and constantly: Indicating the system is struggling to cool itself.
- Extremely high system temperatures: Detectable by touch on the case or through software monitoring.
Diagnosis and Solutions: - Fan Check: Visually inspect that all system fans – CPU cooler fan, case fans, graphics card fans, and PSU fan – are spinning freely and quietly.
- Air Circulation: Ensure your computer has proper airflow. Don't block cooling vents (especially crucial for laptops). Position desktop towers in an open area, not shoved into a tight cabinet.
- Temperature Monitoring: Check your computer's CPU and GPU temperatures from the BIOS/UEFI settings or using diagnostic programs like HWMonitor, Core Temp, or SpeedFan.
- Dust Removal: Dust is an insulator and clogs heatsinks and fans. Use compressed air to thoroughly clean out any dust buildup from inside your computer, focusing on CPU heatsinks, GPU fans, and case vents. Do this outside or in a well-ventilated area.
- Thermal Paste: If your CPU temperatures are still high after cleaning, the thermal paste between your CPU and its heatsink may have dried out and lost effectiveness. Replacing it is a delicate but often highly effective solution for lowering CPU temperatures.
- Better Cooling: For high-performance systems or if you experience persistent overheating, consider upgrading to a more robust cooling solution, such as a larger air cooler or a liquid cooling system.
The Unresponsive Helper: Peripheral Device Problems
Keyboards, mice, printers, USB drives, and other external devices can also experience malfunctions, leading to frustration and productivity loss.
Symptoms:
- Device stops working entirely: No response from input devices, no recognition of storage.
- Erratic behavior: Mouse pointer jumps, keys register multiple times, printer jams constantly.
- "Device not recognized" errors: Windows or macOS fails to identify a connected peripheral.
Troubleshooting and Solutions: - Loose Connections: The simplest fix is often the most overlooked. Ensure all cables are securely plugged into both the peripheral and the computer. Try a different USB port.
- Test on Another Computer: Connect the peripheral to a different computer. If it works there, the problem lies with your original computer's port, drivers, or settings. If it doesn't work, the peripheral itself is likely faulty.
- Update/Reinstall Drivers: Outdated or corrupt drivers are a common cause of peripheral issues.
- Windows: Go to Device Manager (search "Device Manager" in Start). Find the problematic device, right-click, and select "Update driver." If that doesn't work, try "Uninstall device" and then restart your computer to allow Windows to reinstall generic drivers, or manually download the latest drivers from the manufacturer's website.
- macOS: Peripheral drivers are typically handled by macOS updates. Check System Settings > General > Software Update. For third-party peripherals, visit the manufacturer's website for specific drivers or software.
- Faulty Peripheral: If all troubleshooting steps fail and the device doesn't work on another computer, it's time to replace the faulty peripheral.
Keeping the Gears Turning: Preventive Measures
An ounce of prevention is worth a pound of cure, especially when it comes to hardware. Proactive maintenance can significantly extend the life of your components and prevent unexpected downtime.
Regular System Maintenance
- Dust Regularly: Every few months, power down and unplug your computer. Open the case (for desktops) or carefully clean vents (for laptops) with compressed air. Dust buildup restricts airflow and causes overheating, which is a leading cause of hardware failure.
- Keep Software Updated: While not direct hardware protection, keeping your operating system and drivers updated ensures optimal compatibility and performance, reducing strain that can indirectly affect hardware.
- Monitor Temperatures: Install software to monitor CPU and GPU temperatures, especially during intensive tasks. If you notice consistently high temperatures, address the cooling issue before it becomes a failure.
Best Practices
- Avoid Overclocking Without Proper Cooling: While overclocking can boost performance, it significantly increases heat and stress on your CPU and GPU, which can shorten their lifespan if not accompanied by robust cooling solutions.
- Shut Down Properly: Always shut down your system using the operating system's proper shutdown procedure, rather than simply forcing a power-off. Abrupt power cuts can corrupt data and put unnecessary stress on components, particularly hard drives.
- Use Surge Protectors/UPS: Invest in a good quality surge protector to shield your electronics from power spikes. For critical systems, an Uninterruptible Power Supply (UPS) provides battery backup, allowing for a graceful shutdown during power outages.
Dispelling the Myths: Common Misconceptions
Misinformation about hardware failures can lead to unnecessary panic or improper troubleshooting. Let's clear up a couple of common myths.
- Myth: A virus can destroy hardware.
Reality: Malware and viruses primarily target software. They can corrupt your operating system, steal data, or render your computer unusable by software means. While some sophisticated malware might intentionally stress components (e.g., by running the CPU at 100% constantly), leading to excessive heat or overuse, it generally doesn't "destroy" physical hardware directly. The damage is indirect, from the prolonged strain. - Myth: Overclocking is always safe if done right.
Reality: While modern CPUs and GPUs have built-in safeguards, overclocking inherently pushes components beyond their manufacturer-specified limits. Even "done right" with excellent cooling, it still increases electrical stress and heat, which, over time, can shorten the lifespan of your components compared to running them at stock speeds. It's a trade-off: performance now, potentially reduced longevity later.
Beyond the DIY: When to Call in the Pros
While empowering yourself with troubleshooting skills is invaluable, there are times when waving the white flag and seeking professional help is the smartest move.
- Lack of Comfort or Time: If you're simply not comfortable working with delicate internal components, or if you lack the time to dedicate to thorough troubleshooting, a professional can save you a lot of headache.
- DIY Attempts Failed: You've followed the steps, tried the diagnostics, and the problem persists. This is a sign that the issue might be more complex than basic troubleshooting can address.
- Complex Component Replacement: Tasks like motherboard replacement are intricate and often require specialized tools and knowledge. Incorrect installation can lead to further damage.
- Data Recovery: For critical data on a physically failing hard drive, professional data recovery services have clean rooms and specialized equipment that DIY methods can't replicate.
- Warranty Concerns: If your device is still under warranty, attempting a DIY repair might void it. A professional repair center (especially an authorized one) can often perform repairs without voiding your warranty.
Professional technicians have specialized diagnostic tools and a depth of experience that can quickly and accurately pinpoint issues, often saving you from costly trial-and-error replacements.
Your Next Move: Empowering Action
Resolving hardware and device malfunction errors can feel like a daunting challenge, but with the right approach, it's a solvable one. Remember the systematic process: identify symptoms, use diagnostic tools, and address the most likely culprits methodically. Whether it's a simple reseating of RAM, a thorough cleaning to combat overheating, or the decision to seek expert assistance for a complex motherboard issue, you now have a comprehensive roadmap.
Your computer is an indispensable tool, and keeping it running smoothly is within your grasp. Embrace these troubleshooting skills, maintain your system diligently, and you'll navigate the inevitable hardware hiccups with confidence, keeping your digital life productive and frustration-free.